The Power Tools Menu
The Production Editor uses the Power Tools commands to insert tags, edit elements, renumber equations, and reorder affiliations and abbreviations.
Tell Me More...
Insert Tag
Use this command to tag elements within the article XML to facilitate online linking. Email addresses, database entries, glossaries, inline supplements, and supplemental data are examples.
To insert a tag
- Select text for tagging.
- Click the Power Tools menu>Insert Tag.
- Select the Tagging Type.
- Click Tag Item. You can choose one of these types:
| Email address | None |
| Database link | Select a database from the Database drop-down. Enter an Accession Number. |
| Glossary link | Type the Term. Select an Id from the Select Term ID drop-down. |
| Simple inline-supplement | Select a Mime Type, either application or video. Select a Mime Subtype. Type the File Name. |
| Supplemental data link | None |
When complete, click Tag Item. ArticleExpress displays the result in the Result Text box.
- If satisfied, click Apply or go back and edit your entries.
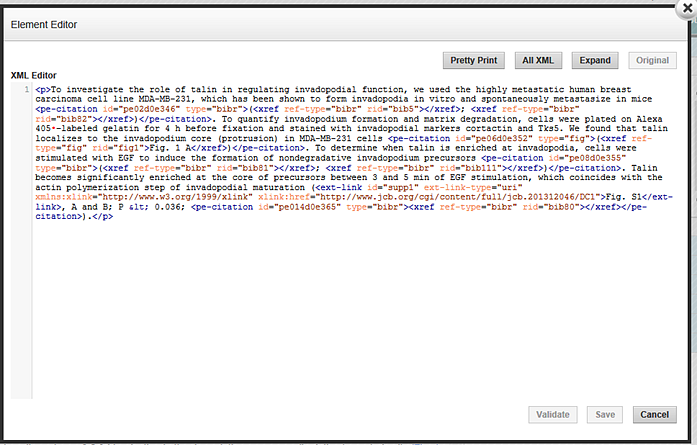
Element Editor
Use this command to view and work with the complete XML received from the peer-review system.
The works with the selected text, such as a paragraph. If your cursor is within an element, ArticleExpress selects the entire element and displays it in the Element Editor. For example, if the cursor is within the Abstract and you select the Element Editor command, ArticleExpress displays only the Abstract section's XML.
Note: If you aren't familiar with XML and the elements in your document, your edits can cause your document to fail validation.
Available Commands
The following commands are available:
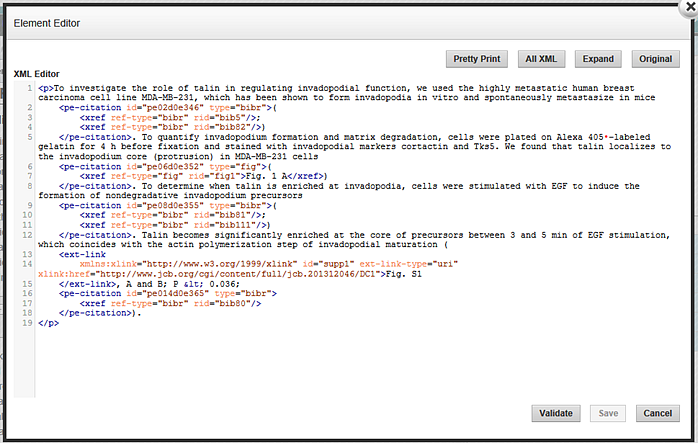
- Pretty Print—Adds spacing, line breaks, and other formatting to make the XML easier to read, as seen here.
Compare the original XML with the Pretty Print version.
- All XML—Displays the entire article XML.
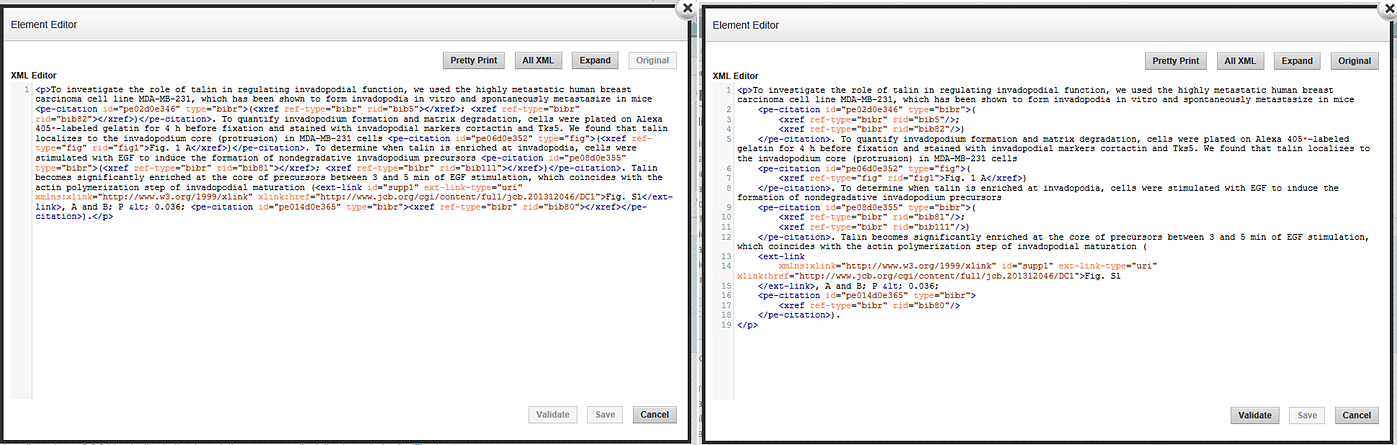
- Expand—Expands the selection outwards to the next tags. For example, if you select a paragraph, ArticleExpress displays the data within the <p>and </p> tags. If you click Expand, ArticleExpress expands to include the element that encompasses the <p> </p> tags, such as <abstract> </abstract>.
- Original—Displays the originally selected text and tags.
- Validate—After you add text to the XML Editor, use this command to validate it. ArticleExpress informs you of errors. Click Download Report to download and view the validation errors.
- Save—Available if there are no validation errors. Click Save to save the article with the additional text.
Note: Text edits such as deletions or additions will be saved without color highlighting as seen with other edits.
- Cancel—Cancels any unsaved changes and closes the Element Editor dialog box.
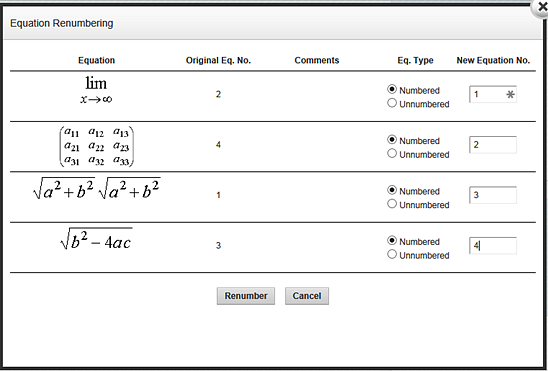
Renumber Equation
Use this command to renumber equations that are out of numeric order. For information on adding equations, see the Equations topic.
To renumber equations
- Click the Power Tools menu
 and then click Renumber Equations.
ArticleExpress may ask you to run . Click Process>File Cleanup and follow the prompts.
- In the Equation Renumbering dialog box, type the correct order next to each equation.
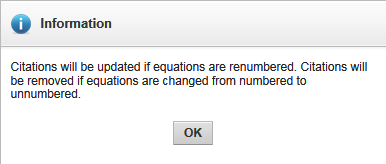
- Click Save. ArticleExpress alerts you about the effects of the changes.
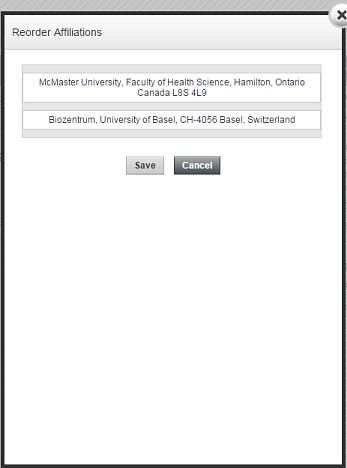
Reorder Affiliations
Use this command to reorder the affiliations that are out of order due to additions, deletions, or editing changes. For information on adding affiliations, see Affiliations in the Footnotes topic.
To reorder affiliations
- Click the Power Tools menu and then click Reorder Affiliations.
ArticleExpress may ask you to run File Cleanup. Click Process>File Cleanup and follow the prompts.
- In the Reorder Affiliations dialog box, drag the affiliations into the correct order.
- Click Save. ArticleExpress saves your changes and reorders the affiliations.
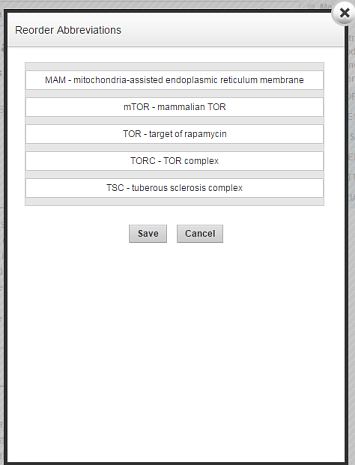
Reorder Abbreviations
Use this command to reorder the abbreviations in alphabetic order. For information on adding abbreviations, see Abbreviations in the Footnotes topic.
To reorder abbreviations
- Click the Power Tools menu and then click Reorder Abbreviations.
ArticleExpress may ask you to run File Cleanup. Click Process>File Cleanup and follow the prompts.
- In the Reorder Abbreviations dialog box, drag the abbreviations into the correct order.
- Click Save. ArticleExpress saves your changes and reorders the abbreviations in the article.
Remove Supplemental Data
Use this command to permanently remove all supplemental data from your article, if it exists. This is not marked as a change.
To remove supplemental data
- Click the Power Tools menu and then click Remove Supplemental Data. ArticleExpress displays a confirmation dialog box.
- Click OK to remove the data or click Cancel.
powertools.htm | Copyright © 2015 Dartmouth Journal Services All Rights Reserved.